If you’ve ever wondered why your online privacy might be at risk despite using a VPN, you may have stumbled upon the concept of a DNS leak. But what exactly is a DNS leak, and why should you care? Read the Best info about dns leak test.
In simple terms, a DNS leak occurs when your DNS requests are sent outside the secure VPN tunnel, revealing your browsing activity to your Internet Service Provider (ISP) or even malicious actors. That sounds a bit scary, right? But don’t worry, we’ve got you covered.
This guide will walk you through what DNS leaks are, how to identify them, and most importantly, how to fix them. So, let’s get started on safeguarding your online privacy.
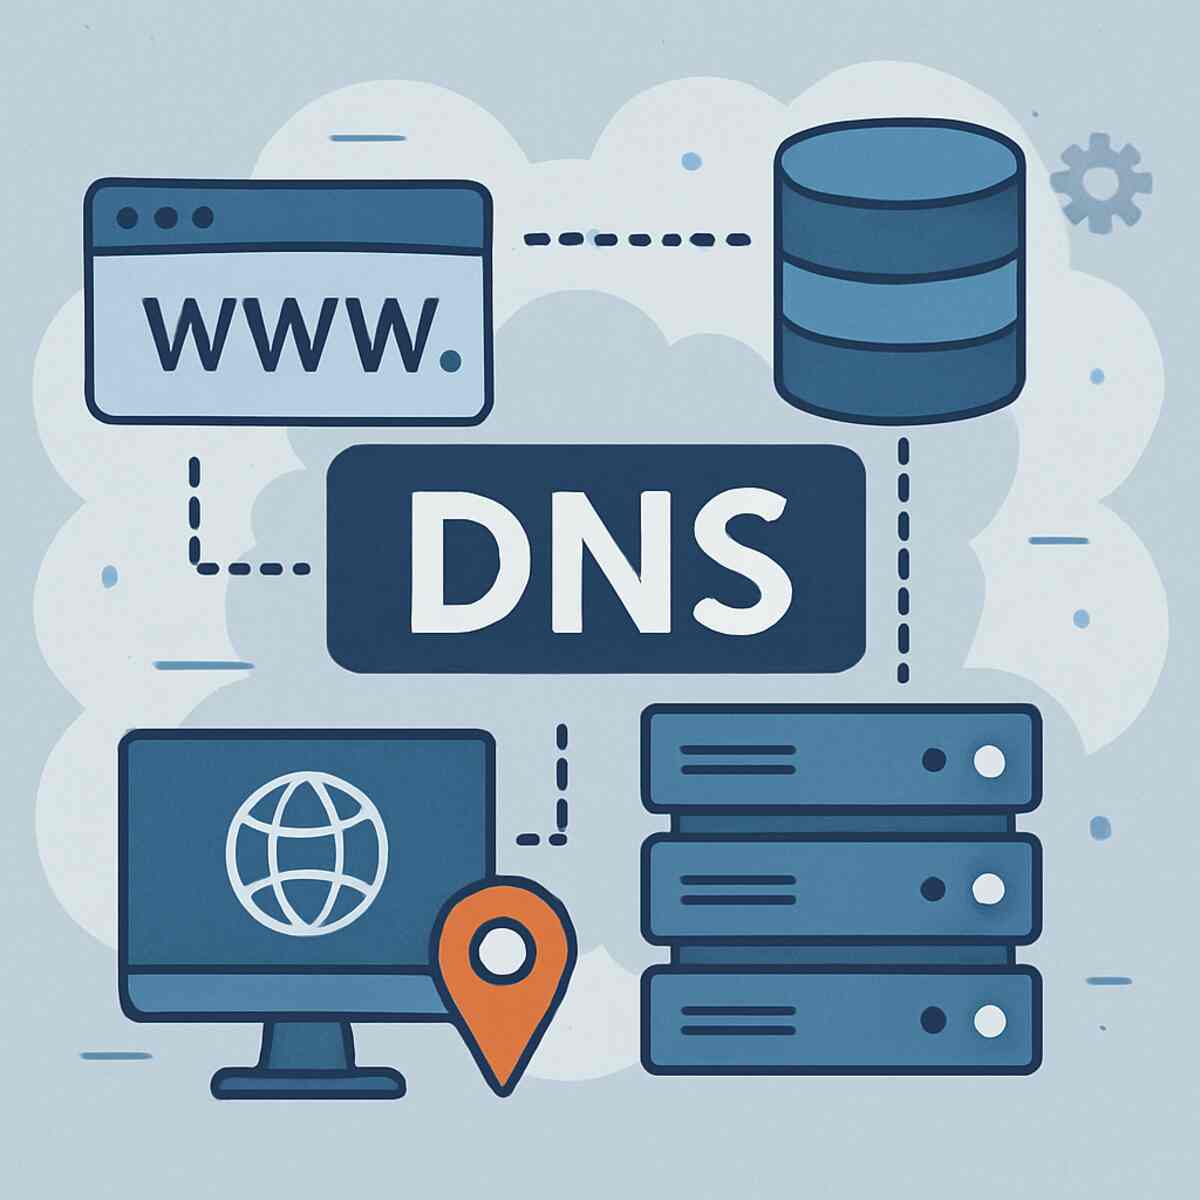
When you type a website address into your browser, your computer sends a request to a DNS server to find the IP address associated with that domain. Typically, this request is handled by your ISP’s DNS server. However, if you’re using a VPN, your DNS requests should be routed through the VPN’s secure tunnel to maintain privacy. A DNS leak happens when these requests bypass the VPN, exposing your activity.
Understanding DNS Requests
DNS requests are essentially the backbone of internet browsing. Every time you enter a URL, your device asks a DNS server to translate that human-readable address into a numeric IP address. This process happens in the background, often without the user even realizing it. However, it is crucial because if these requests are not secure, they can reveal your browsing history to ISPs or cybercriminals.
VPN and DNS: A Secure Connection
When you connect to a VPN, it creates a secure tunnel for your internet activities. This tunnel is designed to protect your data from being intercepted by prying eyes. Ideally, DNS requests should also be encrypted and sent through this secure tunnel. This ensures that even your ISP cannot see which websites you are visiting, thus maintaining your online anonymity and privacy.
The Risks of DNS Leaks
The risks associated with DNS leaks are significant. They can expose your browsing habits to unauthorized parties, including advertisers, hackers, or even governmental agencies. This exposure can lead to tracking, profiling, and sometimes even data theft. Therefore, understanding and preventing DNS leaks is a critical aspect of online security.
Why Should You Care About DNS Leaks?
DNS leaks can undermine the very purpose of using a VPN. They can reveal your browsing habits to your ISP or other prying eyes, potentially putting your sensitive information at risk. Whether you’re an aspiring novelist, content marketer, or a graduate student, maintaining online privacy is crucial.
Implications for Personal Privacy
For individuals, DNS leaks are a direct threat to personal privacy. In an age where data is a valuable commodity, your browsing habits can be used to build a profile about you. This profile can be sold to advertisers or used for more malicious purposes like identity theft. Therefore, maintaining the confidentiality of your DNS requests is paramount.
Professional Concerns
For professionals, especially those working with sensitive information, DNS leaks can have severe implications. Imagine a journalist researching confidential topics or a researcher working with proprietary data. If DNS requests are leaked, it could lead to breaches that compromise not only personal data but also sensitive professional information.
The Broader Security Context
In the broader context of cybersecurity, DNS leaks highlight the vulnerabilities that can exist even when using security tools like VPNs. They serve as a reminder that while VPNs are powerful, they are not infallible. Users must remain vigilant and proactive in their approach to online security to protect themselves from these potential pitfalls.
Common Causes of DNS Leaks
Several factors can contribute to DNS leaks, and understanding these causes is the first step in preventing them.
Default DNS Settings
Often, devices are configured to use the ISP’s DNS servers by default. This means that even when connected to a VPN, the device might still send DNS requests to the ISP’s servers unless manually changed. This default setting is a common oversight that can lead to unintentional leaks.
VPN Software Issues
Not all VPNs are created equal. Some might not effectively reroute DNS requests due to software limitations or bugs. It’s crucial to choose a VPN provider that explicitly states they have DNS leak protection. Additionally, keeping VPN software updated ensures that any known vulnerabilities are patched.
Operating System Configurations
Certain operating system settings might inadvertently cause DNS leaks. For instance, some OS might prioritize using local DNS servers over those provided by the VPN. Additionally, system updates or changes can reset network configurations, leading to potential leaks if not monitored closely.
Network-Specific Issues
Sometimes, the network you are connected to can cause DNS leaks. Public Wi-Fi networks or corporate networks with specific configurations might force DNS requests through their servers, bypassing the VPN. Understanding the network environment and its potential impact on DNS requests is essential for maintaining privacy.
How to Perform a DNS Leak Test
Before diving into fixes, it’s essential to confirm if you actually have a DNS leak. Here’s how you can perform a DNS leak test.
Step 1: Disconnect from Your VPN
Start by disconnecting your VPN. This step ensures that you know what your DNS requests look like without a VPN. By establishing a baseline, you can better understand how your DNS requests are handled by your ISP. This is a crucial first step in identifying any discrepancies once you connect back to your VPN.
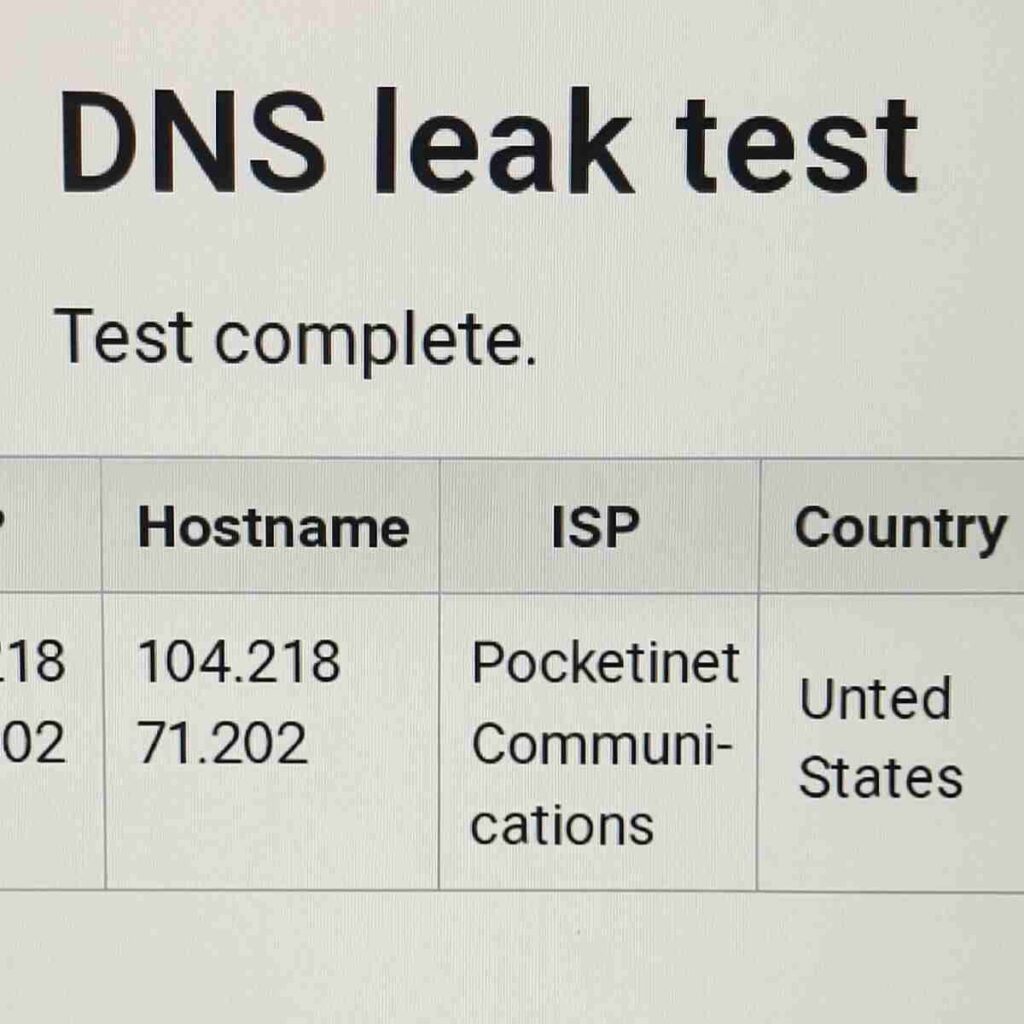
Step 2: Use a DNS Leak Test Website
Visit a DNS leak test website like dnsleaktest.com. These sites are designed to show the DNS servers your requests are hitting. Note the IP addresses and locations displayed. Running multiple tests can provide a more comprehensive view of where your DNS requests are being routed. This step helps confirm whether your DNS requests are being exposed to entities outside of your VPN.
Step 3: Connect to Your VPN
Reconnect to your VPN and refresh the DNS leak test page. If the DNS servers shown are different from the ones noted earlier, your VPN is doing its job. If not, you might have a DNS leak. Testing under different conditions, such as changing servers or protocols, can provide additional insights into potential leaks. This step ensures that your VPN is effectively rerouting your DNS requests as intended.
Fixing DNS Leaks: Step-by-Step Solutions
Now that you’ve identified a DNS leak, let’s fix it! Here’s a step-by-step guide to patching up those leaks.
Solution 1: Change Your DNS Settings
Sometimes, all it takes is a quick DNS server change to fix leaks.
- Access Network Settings: Go to your network settings. This varies by operating system, but generally, you’ll find this in your control panel or settings menu. Familiarizing yourself with your device’s network settings is the first step in taking control of DNS configurations.
- Select Internet Protocol Version 4 (TCP/IPv4) under the properties of your network connection. This step is crucial as it allows you to manually specify which DNS servers your device should use.
- Use Custom DNS Servers: Enter public DNS servers like Google’s (8.8.8.8 and 8.8.4.4) or Cloudflare’s (1.1.1.1 and 1.0.0.1). These servers are known for their reliability and privacy features. Switching to these servers can often resolve DNS leaks by ensuring requests are not routed through your ISP’s servers.
Solution 2: Use a VPN with Built-in DNS Leak Protection
Not all VPNs come with DNS leak protection. If your current VPN lacks this feature, consider switching to a more robust VPN service that guarantees DNS leak protection. Researching VPN services and reading user reviews can help in selecting a provider known for its strong privacy measures. A VPN with built-in DNS leak protection ensures that all DNS requests are securely routed through the VPN’s servers, providing an additional layer of security.
Solution 3: Adjust Your Firewall Settings
A well-configured firewall can prevent DNS leaks by blocking DNS requests that don’t go through the VPN.
- Access Firewall Settings: Check your firewall settings, usually found in the security section of your device’s settings. Understanding your firewall’s capabilities and configurations can enhance your device’s overall security posture.
- Create Rules: Set rules to block outbound DNS requests that don’t go through your VPN’s DNS servers. This step involves creating specific firewall rules that ensure all DNS requests are funneled through the VPN, preventing any accidental leaks.
Solution 4: Update or Reinstall Your VPN Software
Sometimes, simply updating or reinstalling your VPN can resolve DNS leaks. This ensures you have the latest features and bug fixes. Regularly checking for software updates can prevent vulnerabilities that might cause DNS leaks. Reinstalling the VPN software can also reset any incorrect configurations that may have been inadvertently set, providing a clean slate for secure browsing.
Extra Tips for Enhanced Online Privacy
Regularly Check for DNS Leaks
Make it a habit to test for leaks, especially after changing VPN settings or providers. Regular testing allows you to catch and address potential issues before they compromise your privacy. It also ensures that your VPN and DNS settings are functioning as intended, providing ongoing peace of mind.
Keep Software Updated
Regular updates for your VPN, firewall, and operating system can patch known vulnerabilities. Software developers continuously work to address security flaws, so keeping your software updated is a proactive measure to protect your privacy. Enabling automatic updates can make this process seamless and ensure you are always running the most secure versions.
Use a Kill Switch
Some VPNs offer a kill switch feature that cuts your internet connection if the VPN drops, preventing any leaks. This feature is particularly useful in maintaining privacy during unexpected disconnections. By automatically stopping all internet traffic until the VPN connection is reestablished, a kill switch ensures that your data is never exposed.
Conclusion
Congratulations! You’re now armed with the knowledge to tackle DNS leaks head-on. Whether you’re writing your next novel, crafting engaging content, or preparing an academic paper, keeping your online activities private is essential. By following these steps, you can ensure your VPN is functioning correctly and your privacy is intact.
Remember, the internet can be a wild place, but with the right tools and know-how, you can navigate it safely and securely. Happy browsing!