


The custom apparel industry has undergone a massive transformation over the last decade, and at the center of this revolution is the DTF printer. If you are in the business of creating custom t-shirts, hoodies, tote bags, or even hard goods, you have likely heard the buzz surrounding Direct-to-Film (DTF) technology. But with so many garment decorating methods available—from classic screen printing to Direct-to-Garment (DTG), sublimation, and Heat Transfer Vinyl (HTV)—how do you know which method is right for your business? Get the Best information about direct to film printer.
In this comprehensive guide, we are going to dive deep into the world of DTF printing. We will explore the mechanics behind the technology, provide a detailed comparison against traditional methods, and offer actionable advice on equipment, maintenance, and setup. Whether you are a seasoned print shop veteran or looking to build a setup for small business garment printing, this guide will equip you with everything you need to make an informed decision.
Understanding the Direct to Film Printing Process
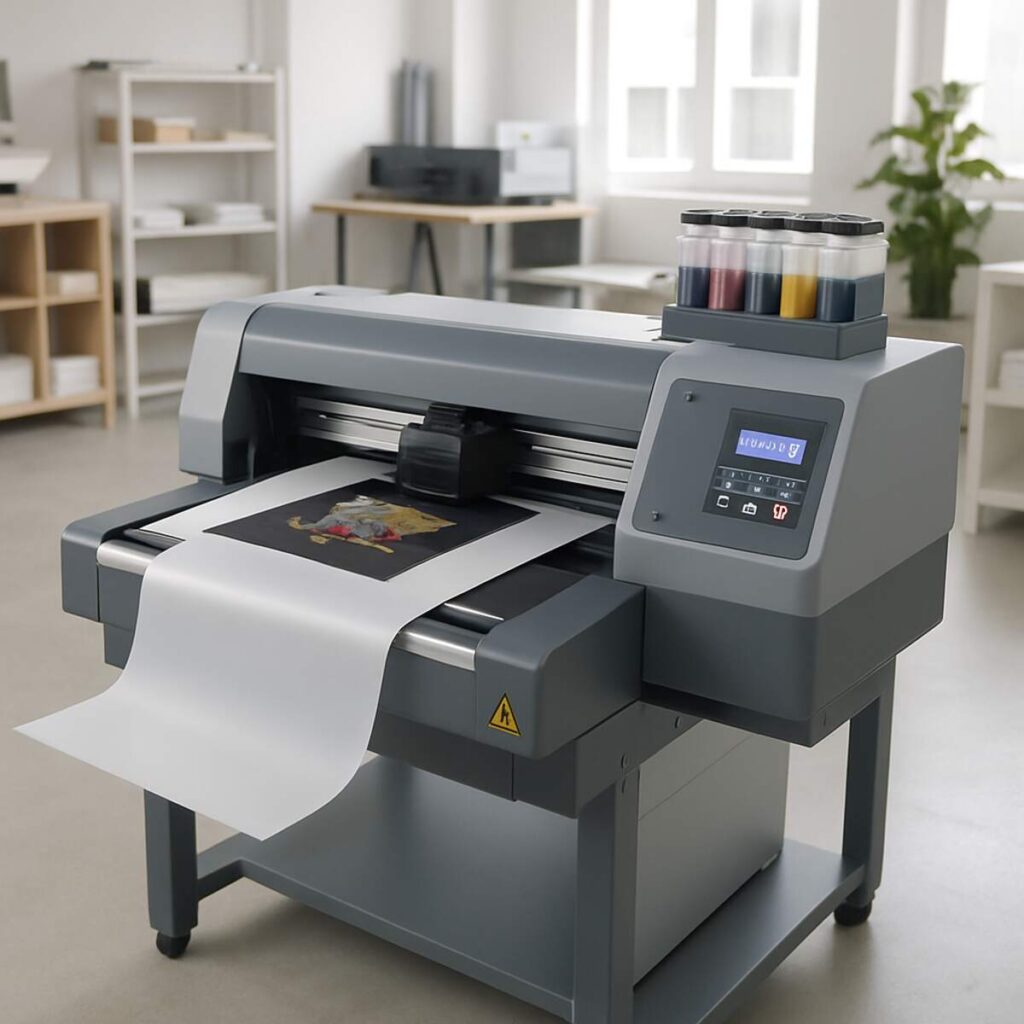
Before we can compare a DTF printer to other technologies, we must thoroughly understand how it works. The direct to film printing process is a multi-step workflow that involves printing a design onto a specialized PET (Polyethylene Terephthalate) film, coating it in an adhesive powder, curing that powder, and then using a heat press to transfer the design onto a substrate.
Unlike other methods that print directly onto the fabric, printing on a film acts as a middleman. This seemingly extra step is actually the secret weapon of DTF, allowing decorators to bypass fabric limitations, avoid messy chemical pretreatments, and produce highly durable, vibrant prints on almost any material.
Step 1: Digital Design and RIP Software
The journey of a DTF transfer begins on a computer screen. Because DTF printers rely on complex ink layering—specifically laying down a base layer of color and a top layer of white ink—standard printer drivers will not suffice. You need specialized RIP software for garment printing.
RIP (Raster Image Processor) software translates your digital design into a language the printer understands. It handles critical tasks such as:
- Color Management: Ensuring the colors on your screen match the final output.
- White Ink Generation: Automatically creating a white underbase or overbase. In DTF, the white ink is printed last (on top of the color) so that when the film is flipped over and pressed onto the shirt, the white ink sits against the fabric, allowing the colors to pop.
- Choking: Reducing the spread of the white ink layer by a few pixels so it doesn’t peek out from behind the colored edges of your design.
Step 2: Printing the Film
Once the design is processed, it is sent to the DTF printer. The printer lays down the design onto the PET film. These films are engineered to hold wet ink without it pooling or running.
A critical factor here is CMYK and white textile ink compatibility. The color inks (Cyan, Magenta, Yellow, Black) must bond perfectly with the white ink layer. If the inks are incompatible, they can separate during curing or wash out prematurely. High-quality textile inks are formulated to stretch and bend with the garment, preventing cracking.
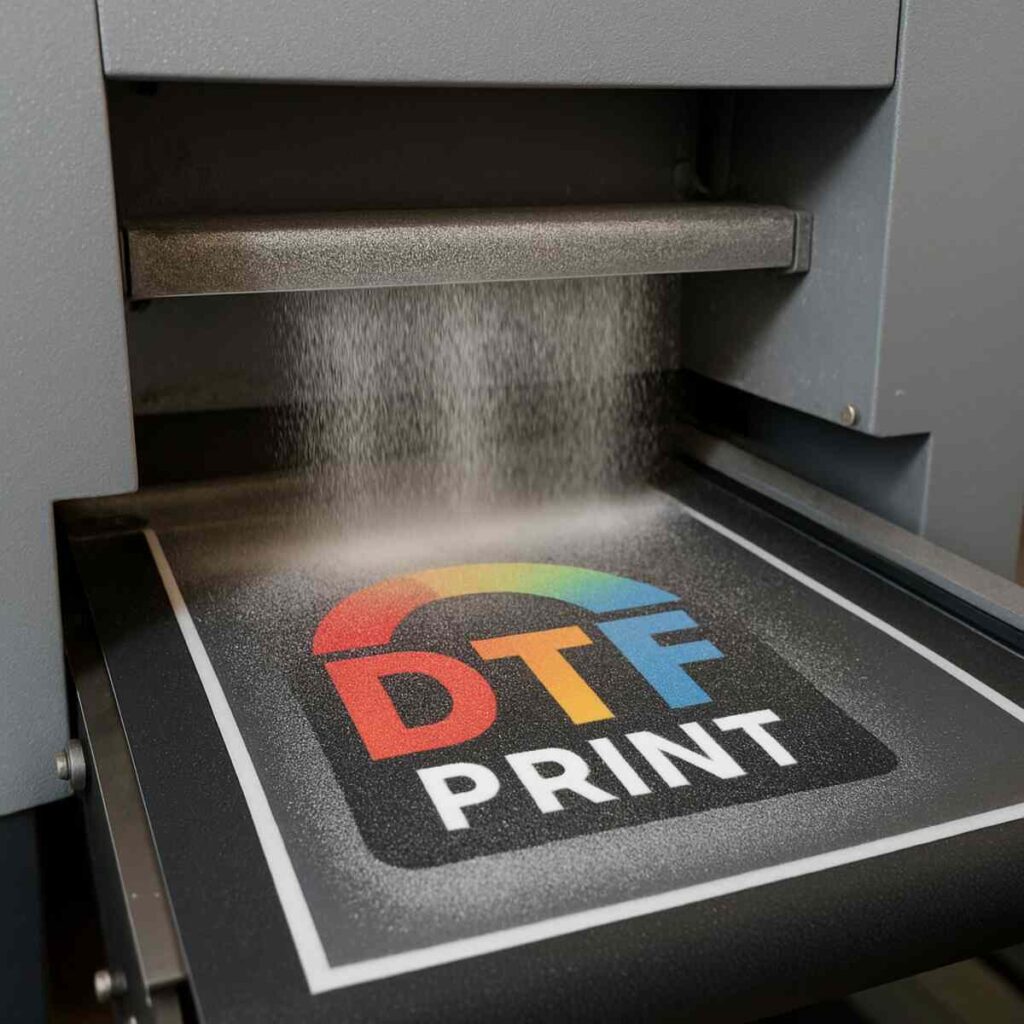
Step 3: Applying the Adhesive Powder
After the film exits the printer, the ink is still wet. This is where the magic happens. You must coat the wet ink with a specialized hot-melt polyurethane powder. This powder acts as the glue that will eventually bind the ink to your garment.
Learning how to apply dtf adhesive powder correctly is vital. You can do this manually by pouring the powder over the wet film in a shallow bin, shaking it gently so it coats the wet ink, and then flicking the back of the film to remove excess powder from the non-printed areas.
However, for high-volume shops, this manual process is tedious and inconsistent. This is where the automatic powder shaker benefits become undeniable. An automatic shaker attaches inline to your printer. It continuously feeds the printed film through a powder bath, uses a motorized beater to knock off the excess, and ensures a perfectly even coat of adhesive every single time. This not only speeds up production dramatically but also keeps airborne powder particles out of your workspace, making it a much healthier option for operators.
Step 4: Curing the Powder
Once coated, the powder must be melted into the ink. This is done using a curing oven or, in a pinch, hovering a heat press over the film. The powder melts into a glossy, rubbery adhesive layer that bonds with the white ink.
Getting your curing oven settings for pet film dialed in is crucial. If the temperature is too low, the powder won’t fully melt, resulting in a weak bond and poor washability. If the temperature is too high, the powder can scorch, or the PET film can warp and shrink. Generally, curing is done at temperatures between 230°F and 250°F (110°C – 120°C) for 2 to 3 minutes. The visual cue for a perfect cure is a change in the powder’s appearance—it should transition from a sugary, granular look to an even, glossy, “orange peel” texture.
Step 5: Pressing the Transfer
The final step is the actual DTF transfer onto the garment. You place your garment on a heat press, position the cured film (ink side down), and press.
Nailing the direct to film transfer temperature and pressure will dictate the longevity of the garment. Typically, you will press DTF at 300°F to 320°F (150°C – 160°C) for 10 to 15 seconds using medium to heavy pressure.
After pressing, you must decide when to peel the film backing. This leads us to the debate of choosing between hot and cold peel film.
- Cold Peel Film: Historically the most common, this film requires you to wait until the garment is completely cool to the touch before peeling. It yields a smooth, matte finish and is highly reliable, but it slows down production time.
- Hot Peel Film: A newer advancement in PET film coating allows you to peel the film immediately after opening the heat press. This vastly increases production speed for high-volume shops, though it requires precise temperature control to avoid peeling the ink off the shirt.
After peeling, most professionals recommend a “second press” for 5 seconds, covering the design with a Teflon sheet or parchment paper. This drives the ink further into the fibers of the garment, increasing durability and removing any plastic-like shine.
DTF vs. Direct-to-Garment (DTG): The Ultimate Showdown
For years, Direct-to-Garment (DTG) printing was considered the gold standard for high-quality, full-color, short-run custom apparel. DTG works much like a standard inkjet paper printer, but it prints directly onto fabric. While DTG produces incredibly soft, breathable prints, the rise of DTF has forced many print shop owners to reconsider their primary printing method.
1. Material Versatility
DTG is notoriously picky. To achieve a high-quality DTG print, you must use garments that are 100% cotton, or at least heavily cotton-blended. Furthermore, dark garments require a sticky liquid pretreatment to give the white ink something to bind to. If you try to DTG print on 100% polyester, nylon, or leather, the ink will bleed, pool, and wash out.
A DTF printer, on the other hand, does not care what material you are pressing onto. Because the ink is bound to the garment via the melted adhesive powder rather than soaking into the fibers, a DTF transfer can be applied to 100% cotton, 100% polyester, 50/50 blends, nylon, spandex, canvas, denim, and even treated leather. This versatility allows businesses to offer a vastly wider catalog of products without changing their printing process.
2. The Pretreatment Factor
Pretreating garments for DTG is often considered the bane of a printer’s existence. It involves spraying a chemical sizing agent onto the shirt, pressing it dry, and then printing. If you use too much pretreatment, the shirt becomes stiff and stains; too little, and the print looks dull and washes away.
DTF completely eliminates the need for fabric pretreatment. The “pretreatment” is effectively the adhesive powder that you apply to the film. This saves massive amounts of time, reduces chemical costs, and eliminates the dreaded “pretreatment box” stain that plagues many dark DTG shirts.
3. Cost Analysis of DTF vs DTG
When performing a cost analysis of dtf vs dtg, DTF almost universally comes out ahead, especially for startups and small to medium-sized businesses.
- Initial Equipment Cost: A high-quality, entry-level commercial DTG printer can cost anywhere from $15,000 to $30,000, and that doesn’t include the required automatic pretreatment machine (an additional $4,000 – $6,000). Conversely, a commercial-grade dual-printhead DTF printer complete with an inline powder shaker and curing oven can be purchased for $5,000 to $10,000.
- Consumables: DTG ink is notoriously expensive, often costing hundreds of dollars per liter. DTF ink is significantly cheaper. Additionally, you are replacing expensive DTG pretreatment with highly affordable DTF adhesive powder and PET film.
- Labor Costs: Because DTF allows you to print continuous rolls of transfers unattended, labor costs drop. A single operator can manage the printer, shaker, and oven while simultaneously operating two heat presses.
4. Maintenance and Printhead Health
Both DTG and DTF printers use water-based pigment inks, and both heavily rely on white ink. White ink contains titanium dioxide—a heavy mineral that gives the ink its opacity. If left sitting, this mineral settles at the bottom of the lines, causing severe printhead clogs.
Proper white ink circulation system maintenance is mandatory for both technologies. However, because DTF printers are generally more affordable, replacing a clogged printhead is less financially devastating. If you find yourself in a situation requiring fixing clogged printhead nozzles, DTF printheads (often Epson i3200 or XP600 models) can be replaced for $200 to $900. Replacing an industrial DTG printhead can cost upwards of $2,500.
That being said, modern DTF printers feature automated circulation and agitation systems that keep the white ink moving, drastically reducing the chances of a catastrophic clog as long as the machine remains powered on and in a climate-controlled environment.
DTF vs. Sublimation Comparison Guide
Sublimation is another massively popular method for creating custom goods. It involves printing special sublimation dyes onto paper and using high heat to turn that dye into a gas, which then permeates and permanently dyes the fibers of the garment. Let’s look at a detailed dtf vs sublimation comparison guide.
Fabric and Color Limitations
The biggest limitation of sublimation is its strict requirements for substrates. Sublimation dye only bonds to synthetic polymers. This means you must use 100% polyester garments to get vibrant results. If you sublimate onto a 50/50 poly-cotton blend, the dye will only stick to the polyester fibers, resulting in a faded, vintage look.
Furthermore, sublimation does not utilize white ink. The printer assumes the background is white. If you try to sublimate a red logo onto a black polyester shirt, the logo will be completely invisible. Sublimation is strictly for white or very light-colored polyester garments and specially coated hard goods (like mugs and tumblers).
DTF shatters these limitations. Because of the white underbase, you can print a bright white, vibrant logo onto a pitch-black 100% cotton hoodie—something chemically impossible with sublimation.
Feel and Breathability
Where sublimation wins is the “hand feel.” Because sublimation literally dyes the fibers of the shirt, the print has zero weight or texture. You cannot feel the design when you run your hand over it. The garment retains 100% of its breathability.
A DTF transfer, by nature, is a layer of ink and adhesive sitting on top of the fabric. While advancements in RIP software (like adding halftones or rasterizing the image to create negative space) have made DTF prints incredibly soft and breathable, it will never match the zero-feel of a sublimated shirt. It feels similar to a very thin, soft screen print.
Setup and Accessibility
Both methods are highly accessible for a setup for small business garment printing. Sublimation requires a specialized printer (or a converted inkjet printer), sublimation ink, paper, and a heat press. It is arguably the cheapest way to enter the custom apparel market. DTF requires a slightly larger initial investment due to the powdering and curing equipment, but the return on investment is often faster due to the ability to sell cotton and dark-colored garments, which dominate the apparel market.
DTF vs. Screen Printing
Screen printing is the ancient titan of the apparel decorating world. It involves pushing thick plastisol or water-based inks through a woven mesh stencil directly onto the garment.
Order Volume and Setup Time
Screen printing shines in high-volume production. If you need to print 1,000 identical black t-shirts with a one-color white logo, screen printing is the fastest, most cost-effective method on the planet.
However, the setup process for screen printing is incredibly laborious. You must print a film positive, coat a screen in light-sensitive emulsion, burn the image into the screen using UV light, wash out the unexposed emulsion, tape the screen, align it on the press, and ink it up. You have to do this for every single color in the design. If a customer wants just five shirts with a six-color design, the setup time and labor costs make it entirely unprofitable for a screen printer.
This is where DTF dominates. DTF is a digital process. There are no screens, no emulsions, and no color limitations. Printing one shirt costs the exact same amount in materials and setup as printing 100 shirts. This makes DTF the ultimate solution for short runs, print-on-demand fulfillment, and highly complex, photorealistic designs.
Color Complexity
If a customer brings you a photograph or a design with gradients, drop shadows, and millions of colors, screen printing it requires highly advanced simulated process techniques, multiple screens, and immense skill.
A DTF printer prints in full CMYK (plus white), meaning it can produce photorealistic images, smooth gradients, and infinite colors effortlessly in a single pass.
Washability and Durability
Traditionally, a properly cured plastisol screen print outlasts the garment itself. Early iterations of digital transfers had a reputation for cracking and peeling after a few washes.
Today, the washability and durability of dtf transfers are spectacular. When high-quality inks, premium PET film, and flexible polyurethane adhesive powders are used—and properly cured and pressed—a DTF print will easily survive 50 to 100 heavy wash cycles without significant degradation, rivaling commercial screen printing. To maximize durability, always advise customers to wash garments inside out on cold and tumble dry on low.
DTF vs. Heat Transfer Vinyl (HTV)
For crafters and micro-businesses, Heat Transfer Vinyl (HTV) is often the starting point. HTV involves using a vinyl cutter (like a Cricut or Silhouette) to cut a design out of colored vinyl, using a weeding tool to pick away the excess vinyl, and then heat-pressing the design onto the shirt.
The Weeding Bottleneck
The fatal flaw of HTV in a commercial setting is weeding. Picking out the tiny pieces of vinyl inside text and intricate logos is incredibly time-consuming. Time is money in a print shop, and paying an employee to weed vinyl for hours destroys your profit margins.
With DTF, there is zero weeding. The adhesive powder only sticks to the wet ink. When you shake off the excess, the unprinted areas of the film are completely clean. You can print the most intricate, distressed, free-floating text designs imaginable, and it takes the exact same amount of time to process as a solid square block.
Layering and Thickness
If you want a four-color design using HTV, you must cut four different rolls of vinyl, weed four different times, and press the garment four different times, layering the vinyl on top of each other. This results in a thick, heavy, plastic-feeling patch on the shirt (often referred to as a “sweat patch”).
DTF prints all colors simultaneously in a single, incredibly thin layer. It is vastly superior to HTV in feel, production speed, and complexity. HTV still has a place for specialty finishes (like holographic, metallic, or puff vinyl), but for standard multi-color graphics, DTF has rendered HTV almost obsolete in commercial environments.
The Expansion of Technology: Enter the UV DTF Printer
While standard DTF has revolutionized apparel, a new offshoot technology is currently taking the hard-goods promotional market by storm: the uv dtf printer.
While standard DTF uses water-based textile inks and a powdered adhesive meant to melt into fabric fibers, UV DTF is entirely different. It is designed specifically for hard surfaces like glass, metal, plastic, wood, and ceramics.
How UV DTF Works
A UV DTF printer uses ultraviolet-cured inks. The process typically goes like this:
- The printer prints CMYK colors onto a special “A” film.
- It immediately prints a layer of white ink over the colors.
- It prints a layer of UV-curable varnish over the white ink.
- As the film exits the printer, a laminator applies a sticky adhesive “B” film over the top.
The result is effectively a highly durable, 3D-textured, waterproof sticker that does not require a heat press. You simply peel off the backing, rub the transfer onto a hard surface (like a Yeti tumbler, a laptop, or a glass window), and peel off the carrier sheet.
Applications and Differences
UV DTF transfers are scratch-resistant, UV-resistant, and incredibly vibrant. They are replacing traditional sublimation for hard goods because they do not require polymer-coated blanks or mug presses. You can apply a UV DTF transfer to a textured matte black tumbler—something impossible with sublimation.
However, it is vital to remember that a UV DTF printer cannot be used for apparel, just as a textile DTF printer cannot make waterproof decals for glass. They are two distinct technologies serving different sides of the promotional products industry.
Maintenance and Troubleshooting: Keeping Your DTF Printer Alive
The biggest caveat to owning a DTF printer is maintenance. These are not laser printers that you can leave sitting in a corner for a month and expect to work flawlessly upon your return. Liquid ink, specifically white ink, requires attention.
Daily and Weekly Maintenance
If you are running a setup for small business garment printing, you must incorporate maintenance into your daily routine.
- Agitation: Ensure your white ink tank’s agitator is running to prevent pigment settling.
- Nozzle Checks: Print a test pattern every single morning before production. This ensures all nozzles in the printhead are firing.
- Capping Station Cleaning: The capping station (where the printhead rests when not in use) must be kept clean. If ink dries here, it cannot create a vacuum seal against the printhead, leading to air exposure and clogs.
- Wiper Blade Cleaning: The rubber wiper blade that cleans the bottom of the printhead should be wiped down daily with specialized cleaning solution.
Fixing Clogged Printhead Nozzles
Even with the best maintenance, clogs happen. Humidity drops, temperature fluctuations, or a speck of dust can block a nozzle. If a nozzle check shows missing lines, do not panic.
- Light Cleaning: Run the software’s automated head-cleaning cycle. This uses a pump to pull ink through the head, flushing out minor blockages.
- Soaking: If the clog persists, apply a small amount of warm distilled water or specialized printhead cleaning fluid to the capping station foam. Park the printhead over it and let it soak for a few hours. This dissolves dried ink.
- Reverse Flushing: (For advanced users). Using a syringe and soft silicone tubing, gently push cleaning solution through the ink dampener port on the printhead. Never force it, as excessive pressure can rupture the delicate piezoelectric walls inside the printhead, destroying it instantly.
Environmental Control
Your printer’s environment is just as important as the machine itself. Water-based inks require humidity. If the air in your shop is too dry, the ink will dry instantly on the printhead. Aim to keep your print room between 65°F and 80°F, with a relative humidity of 45% to 60%. Investing in a room humidifier and a hygrometer is a cheap way to save thousands of dollars in ruined printheads.
Furthermore, as the industry evolves, more manufacturers are offering eco-friendly heat transfer supplies, including OEKO-TEX certified inks and biodegradable PET films. Utilizing these not only helps the environment but can be a strong selling point for eco-conscious clients.
Building Your DTF Setup: A Blueprint for Small Businesses
If you have weighed the options and decided that DTF is the right path for your business, properly structuring your workspace is critical for efficiency and safety.
Equipment Checklist
To build a highly efficient, professional setup for small business garment printing, you will need:
- The Printer: Decide between a desktop conversion (cheaper, more maintenance, slower) or a commercial roll-to-roll machine with dual printheads (faster, more reliable, higher upfront cost).
- Powder Application/Curing: You can start with manual powdering bins and a small clamshell curing oven, but if budget allows, investing in an automated shaker/baker combo will save you endless hours of labor.
- Ventilation: Melting polyurethane adhesive creates fumes. You must ventilate your curing oven. Either vent it directly outside using ducting and an inline fan or invest in a commercial fume extractor with HEPA and activated carbon filters.
- Heat Press: A high-quality heat press is non-negotiable. Cheap heat presses have cold spots that will cause your DTF transfers to peel after washing. Look for a press with even heat distribution and heavy pressure capabilities (e.g., Hotronix, Geo Knight).
- Climate Control: Humidifier, dehumidifier (depending on your climate), and an air conditioner.
Workflow Optimization
Arrange your equipment in a linear fashion to minimize footsteps. The digital design station should feed directly to the printer. The printer feeds into the shaker/oven. The finished rolls of film should be easily accessible next to a large cutting table, which is situated right beside your heat press.
By keeping your blank garments organized on racks near the heat press, an operator can simply grab a shirt, cut a transfer from the roll, press, and move the finished product to a packing station.
Calculating ROI (Return on Investment)
Let’s look at why DTF is so lucrative.
- Cost of a blank premium cotton t-shirt: ~$3.00
- Cost of ink, film, and powder for an 11×11 inch chest graphic: ~$0.75
- Labor/Overhead per shirt: ~$1.00
- Total Cost to Produce: ~$4.75
- Retail Selling Price: $25.00 – $35.00
- Gross Profit per Shirt: $20.25 – $30.25
With a commercial DTF printer capable of printing 50 to 100 large transfers an hour, you can easily pay off a $10,000 equipment investment within a few months of steady orders.
Conclusion: Is DTF the Right Choice for You?
The apparel decoration industry is vast, and no single technology is perfect for every single scenario. Screen printing will always be the king of massive, thousands-of-shirts runs. Sublimation will always dominate the athletic polyester jersey market because of its zero-feel breathability.
However, when we look at the landscape of modern custom apparel—where customers demand full-color, photorealistic designs on a variety of fabrics in small to medium quantities—the DTF printer emerges as the undisputed champion of versatility.
It eliminates the weeding nightmares of HTV. It destroys the fabric limitations and pretreatment headaches of DTG. It bypasses the agonizing setup times of screen printing. By mastering the direct to film printing process, optimizing your curing oven settings for pet film, and keeping up with your white ink circulation system maintenance, you unlock the ability to say “Yes” to almost any customer request.
Whether you are launching a brand new clothing line in your garage or scaling up an established commercial print shop, integrating a DTF printer into your workflow is not just a passing trend; it is a fundamental upgrade to how custom apparel is made. Equip yourself with the right tools, dial in your process, and watch your creative possibilities—and your profit margins—soar.